see more Lolcats and funny pictures, and check out our Socially Awkward Penguin lolz!
A Bead A Day
Lisa over at A Bead A Day has put a shout out for help! How can you get swarovski flat back crystals to adhere to rubber?!
About.com Jewelrymaking
Tammy shares her favorite summer necklace design.
Art Bead Scene
Did you know ABS has a designer of the week? Join us in a challenge and you could be featured on ABS!
Beading Arts
The Bead Journal Project is just whizzing by this year, and Cyndi is finally caught up!
Beads and Books
Does your mood influence your jewelry designs? Share your thoughts!
Carmi's Art Life/World
Carmi's post features her favorite find from the CHA show in Chicago this month.
Cindy Gimbrone Beads
Come see what's on Cindy's bookshelf this week.
Earthenwood Studio Chronicles
A special guest stops by the Earthenwood booth at Rust Belt Market: Cari Cucksey of HGTV's Cash & Cari
Resin Crafts!
Resin Crafts show you what can be done with the mold of a grandfather clock.
Snap out of it, Jean! There's beading to be done!
Are you ready to sign up for Lori Anderson's next fabulously fun and creative Bead Soup party? Jean has the scoop on what to do to sign up! Jean participated before and LOVED it. Once you have had "soup" with Lori, you just HAVE to have more! It's irrestible. See Jean's blog for the details!
The Writing and Art of Andrew Thornton
Andrew shares his plans for the future of his online Shop.
Friday, July 29, 2011
Wednesday, July 27, 2011
Making experiments charming
Double dips are a good way to test out potential color combinations instead of taking the time to make a bead. Yet what do I do with those color experiments I don't end up offering to customers?
Make them into charms! Here's the tutorial I wrote last year for the double dip charms. If you don't know where to buy the double dips, they're available over on Cindy Gimbrone Beads. Enjoy!
Tuesday, July 26, 2011
Tuesday Tangle-Tech: Interweave's Live Wire eMag
Ok, I'm a tech-gadget geek. Statistics say I'm not supposed to be a gadget geek, but since when have I been a statistic?
So when I saw that Interweave was publishing Live Wire, I had to download it as soon as it was available.
I've got everything Mac, so I chose to download the Mac version. First of all, let me say kudos to Interweave for being quick to offer digital versions of their magazines so quickly. Not just beading magazines but their knit and crochet magazines along with many others. Kudos for not buying into the statistics that say my demographic isn't tech savvy, I think there are alot of us out there.
Now, onto Live Wire. I downloaded the eMag without any trouble from the website. It ran on my 2007 iMac without any trouble. Live Wire is beautifully laid out and has many within eMag videos to show you how to do the basics of wire wrapping. If you're not always good with following written directions like me, the videos are fabulous. You can see how to hold the pliers and which direction to wrap your wire. I like digital versions like Live Wire because with a click you can jump around to the areas that pique your interest rather than flipping pages to find what you want.
Live Wire is for beginning wire artists. It takes you through step by step with choosing wire, straightening wire, making eye pins, labeling and explaining pliers and more. There's also a nice section on patinas. If you're a beginner and a tech geek, you're gonna love this! If you're an intermediate to advanced wire artist and gadget geek, I'd go with the digital versions of Step by Step Wire or if you love mixed media with your wire Cloth Paper Scissors. Since Interweave is digital, there's lots for beginners, intermediate and advanced wire artists to enjoy! Keep it up, Interweave, I love your tech-savvy-ness!
So when I saw that Interweave was publishing Live Wire, I had to download it as soon as it was available.
I've got everything Mac, so I chose to download the Mac version. First of all, let me say kudos to Interweave for being quick to offer digital versions of their magazines so quickly. Not just beading magazines but their knit and crochet magazines along with many others. Kudos for not buying into the statistics that say my demographic isn't tech savvy, I think there are alot of us out there.
Now, onto Live Wire. I downloaded the eMag without any trouble from the website. It ran on my 2007 iMac without any trouble. Live Wire is beautifully laid out and has many within eMag videos to show you how to do the basics of wire wrapping. If you're not always good with following written directions like me, the videos are fabulous. You can see how to hold the pliers and which direction to wrap your wire. I like digital versions like Live Wire because with a click you can jump around to the areas that pique your interest rather than flipping pages to find what you want.
Live Wire is for beginning wire artists. It takes you through step by step with choosing wire, straightening wire, making eye pins, labeling and explaining pliers and more. There's also a nice section on patinas. If you're a beginner and a tech geek, you're gonna love this! If you're an intermediate to advanced wire artist and gadget geek, I'd go with the digital versions of Step by Step Wire or if you love mixed media with your wire Cloth Paper Scissors. Since Interweave is digital, there's lots for beginners, intermediate and advanced wire artists to enjoy! Keep it up, Interweave, I love your tech-savvy-ness!
Labels:
digital magazines,
eMag,
tech,
Tuesday Tangle
Monday, July 25, 2011
Tool Time: Rolling Mill
I've been wanting to texture metal for awhile now. I want my studio to be as environmentally friendly as possible. So I was reluctant to do chemical etching on metal. So I was looking for another way to texture and transfer images onto metal.
Enter the January issue of Art Jewelry magazine with a whole article on using a rolling mill to transfer an image onto metal.
Since then, I've wanted a rolling mill. I back-ordered a Durston mill from Rio Grande but after 2 months, it still wasn't in so I cancelled and re-thought my purchase. Since I'm not rolling metal at a high volume, I decided to save some money and go with an economy mill.
They call this a mini mill, but I can tell you from bringing the box into the house and unpacking it, it doesn't feel mini. It's heavy!
Because this is an economy mill, there are a few bells and whistles missing. There are no numbers on the top gears help you determine settings. I'm going to get a feeler gauge from the auto parts store ('cuz I can get those quicker than ordering online) to help me with the settings. Once I figure out the settings, then I'll mark the top gears so I won't have to do it again.
I've annealed some copper to run through the mill. I'm off to try it out now. While you wait to see what I'm made, do you have a new tool you're trying out in your studio or maybe in you house?
Enter the January issue of Art Jewelry magazine with a whole article on using a rolling mill to transfer an image onto metal.
Since then, I've wanted a rolling mill. I back-ordered a Durston mill from Rio Grande but after 2 months, it still wasn't in so I cancelled and re-thought my purchase. Since I'm not rolling metal at a high volume, I decided to save some money and go with an economy mill.
They call this a mini mill, but I can tell you from bringing the box into the house and unpacking it, it doesn't feel mini. It's heavy!
Because this is an economy mill, there are a few bells and whistles missing. There are no numbers on the top gears help you determine settings. I'm going to get a feeler gauge from the auto parts store ('cuz I can get those quicker than ordering online) to help me with the settings. Once I figure out the settings, then I'll mark the top gears so I won't have to do it again.
I've annealed some copper to run through the mill. I'm off to try it out now. While you wait to see what I'm made, do you have a new tool you're trying out in your studio or maybe in you house?
Friday, July 22, 2011
Funny Friday and Fabulous Links
see more Lolcats and funny pictures, and check out our Socially Awkward Penguin lolz!
A Bead A Day
As an admirer of all things arts and crafts, Lisa shares the handpainted jewelry pieces of "Moni's Originals". Stop by to check out these miniature works of art!
About.com Jewelrymaking
Looking to make some easy metalsmithing jewelry? Take a look at these new jewelry videos.
Art Bead Scene
Looking for some creative jewelry displays? So is ABS Editor Heather Powers. Come check out what she's found.
Beading Arts
Free-form peyote stitch and wire work...what could be more fun than combining the two?!
Carmi's Art Life/World
Carmi's new ring features a rock garden!
Earthenwood Studio Chronicles
Melanie opens a weeked bead store at her local artist market and has lots of pictures of her booth to share.
Resin Crafts!
Resin Crafts has a great tutorial showing you how to create a pendant with a spoon.
Snap out of it, Jean! There's beading to be done!
Andrew Thornton, a wonderful person and a member of our group, is having a "Virtual Yard Sale" as he calls it . Check it out on Jean's blog and then go have FUN!
The Writing and Art of Andrew Thornton
Andrew hosts a week-long Virtual Yard Sale! The week is filled with Ebay sales, new products added to the Shop, lots of giveaways, and some major deals!
Tuesday, July 19, 2011
Tuesday Tangle: What's your Wire Style?
What's your wire style? I like modern, simple, clean lines. My personal style is different from what we do over at ABS so today is a great opportunity to sing what I love!
Lisa's Lovelies has designed several pieces showcasing clever and modern use of wire wrapping and cold connections. I like how she embellishes judiciously using a single bead or pearl with the herringbone wrap.
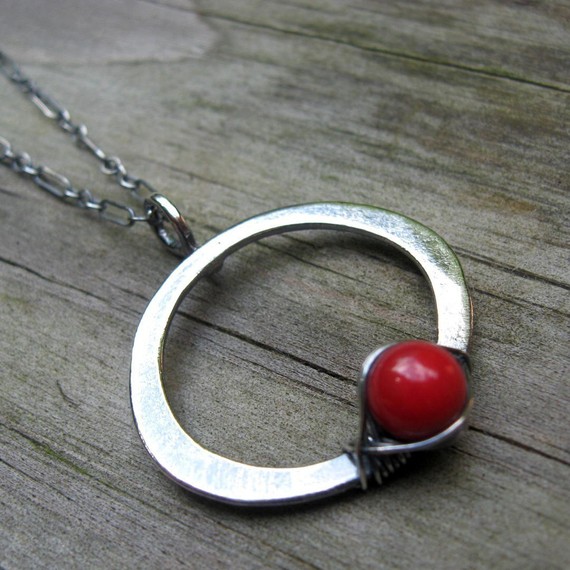
Apple Coral O Necklace
What's your wire style?
Monday, July 18, 2011
On My Bookshelf: Around My Neck
You know I love books and sometimes I don't just read them but wear them around my neck. I thought I'd take you on a tour through the library of some of my favorite tiny wearable books...
We'll start in "the stacks" by JanDaJewelry
Then meander over to the Leather Journals so we can have the journal handy whenever we want.
Or maybe you want a book that's more personal? How about a sterling silver brag book from Bragaboutit?
I love this handmade copper etched book by Hangingbyathread1
Friday, July 15, 2011
Funny Friday and Fabulous Links
A Bead A Day
Over at A Bead A Day, Lisa is looking for input on how much bling to add to a desk accessory with her new hot-fixing jewel tool!
About.com Jewelrymaking
Don't blow off Christmas in July. Instead, use this time to make some awesome beaded ornaments.
Art Bead Scene
Come take a look at ABS Editor Cindy Gimbrone is up to in her studio this week!
Beading Arts
Cyndi shares the instructions for making a freeform peyote stitch necklace. Now the piece just needs a name!
Carmi's Art Life/World
Carmi has found a few new ways to use Apoxie Sculpt!
Cindy Gimbrone Beads
Cindy reviews Hot Connections by Jennifer Chin.
Resin Crafts!
Resin Crafts Blog received a very pretty samples kit...and turned it into a unique wearable.
Snap out of it, Jean! There's beading to be done!
Jean is excited to show what she received (not her finished design however!) from Michelle Mach for the "Mostly Metal" challenge which Michelle is hosting!
The Bead Dreamer
Use a finding in a different way. Try Charlene's chandelier earrings made from bead caps. A tutorial with photos shows you how.
The Writing and Art of Andrew Thornton
Andrew reveals the mystery component for the July Reader's Challenge!
Monday, July 11, 2011
Studio Saturday lingers into Monday....Stamped Copper Saucers for Giveaway
This past Saturday, I was over on Art Bead Scene for Studio Saturday. If you were over there, you know I was busy stamping onto some brass and copper sheet metal I had won in the Rings n Things Blogger drawing.
I stamped a few months back and seemed to catch on quickly. I even wrote a Stamped Bead Bravely Art Ornament tutorial for the holidays. I was confident I could create with any stamps. So I ordered smaller sized script style stamps so I could stamp longer quotes. What I didn't realize was when you switch stamps it's like starting all over again!
I have Lisa Niven Kelly's book out and was going for a variation on the stamped ladder bracelet - making a ladder pendant with a quote from the Buddha, "the way is in the heart."
I measured.
I counted letters.
I measured and counted meticulously.
Everytime I'd put the script style stamp down in the measured area, it was either too far or too close or too high or too low. They weren't behaving like the larger boxy type style.
Arghhh!
I made 8 scrap pieces to every 1 that came out half way decent. I say half way because take a look at the finished products....
They didn't turn out the way I envisioned through no fault of the materials. I ran out of the brass sheet trying to create what I had in my head. After the brass, I switched to copper round blanks without any quotes. These came out much better although the photo is a bit blurred - my Canon is on the fritz and I had to take these pictures with my iPhone!
I used my Euro Power Punch to make a hole in the 3/4'' inch 24 gauge copper blank. Then I stamped the flower on and used my center punch for the pollen. The rounds were then dapped to a slight saucer shape. I aged them using liver of sulfer and polished using baking soda.
That, my friends is how I finally finished the project I started last Saturday! I'll give away a set of two of the stamped copper saucers to the winner of the July 9th Studio Saturday. If you haven't made a comment, be sure to go on over and tell me about how projects move through your studio!
I stamped a few months back and seemed to catch on quickly. I even wrote a Stamped Bead Bravely Art Ornament tutorial for the holidays. I was confident I could create with any stamps. So I ordered smaller sized script style stamps so I could stamp longer quotes. What I didn't realize was when you switch stamps it's like starting all over again!
I have Lisa Niven Kelly's book out and was going for a variation on the stamped ladder bracelet - making a ladder pendant with a quote from the Buddha, "the way is in the heart."
I measured.
I counted letters.
I measured and counted meticulously.
Everytime I'd put the script style stamp down in the measured area, it was either too far or too close or too high or too low. They weren't behaving like the larger boxy type style.
Arghhh!
I made 8 scrap pieces to every 1 that came out half way decent. I say half way because take a look at the finished products....
They didn't turn out the way I envisioned through no fault of the materials. I ran out of the brass sheet trying to create what I had in my head. After the brass, I switched to copper round blanks without any quotes. These came out much better although the photo is a bit blurred - my Canon is on the fritz and I had to take these pictures with my iPhone!
I used my Euro Power Punch to make a hole in the 3/4'' inch 24 gauge copper blank. Then I stamped the flower on and used my center punch for the pollen. The rounds were then dapped to a slight saucer shape. I aged them using liver of sulfer and polished using baking soda.
That, my friends is how I finally finished the project I started last Saturday! I'll give away a set of two of the stamped copper saucers to the winner of the July 9th Studio Saturday. If you haven't made a comment, be sure to go on over and tell me about how projects move through your studio!
Saturday, July 09, 2011
My Bookshelf: Hot Connections Jewelry
I'm a bookaholic. I've got shelves and shelves dedicated to just books in my home office/jewelry making studio.
I'm always on the look out for books on techniques I want to add to my bead and jewelry making repetoire. My current artistic vision includes metal so I've acquired a few books on metal to help me develop new skills, Mixed Metal Mania, Metalworking 101 for Beads and my most recent book, Hot Connections Jewelry by Jennifer Chin.
Hot Connections Jewelry by Jennifer Chin - Excerpt
The cover is full of Jennifer's fresh and modern metal jewelry. The front cover alone made me want to dive right into the projects. Turning to the table of contents provides you with a snapshot of what's in store for you. Chapters include: Soldering Basics; Essentials of Fabrication & Soldering Techniques; Forming Metal: Other Fabrication Techniques; Textures, Patinas & Finishing; Adding Stones & Beads; Advanced Techniques.
If you're new to fabricating jewelry, Chapter 1, Soldering Basics takes you step by step in clear and simple directions on how to set up your studio and what soldering is all about. On page 21, she discusses the different kinds of torches and makes a recommendation based on how whether you're a hobbyist or production jewelry maker.
Chapter 2, Essentials of Fabrication is quite extensive covering, measuring, drilling, sawing, filing, sanding, bending, shaping, making jump rings, making rivets, soldering and pickling in 9 lessons. You don't want to skip any of the steps. I'm not a detailed oriented person and I tend to skip drawing out the measured lines but I've learned through many mistakes, it's not a step you want to skip.
Each chapter is set up to teach a category of techniques and then the chapter is broken down into techniques and projects. So for example, the category of techniques for chapter 3 is Forming Metal. One of the techniques in chapter 3 is taught in lesson 12: Using a Dapping Block. A list of tools and materials is given and step by step full color photos lead you through the skill of dapping. Lesson 12 is followed by the gorgeous Domed Petal Earrings project where you can put your new skill to use immediately.
If you've dabbled in jewelrymaking or have some of the tools like me, the first two chapters will help you fill in your tool chest with any missing tools. I just ordered a rolling mill for my studio and was excited to see on page 94 how to emboss using a rolling mill.
The book is interspersed with black and white sketches and full color photographs. The sketches are helpful and much more informative than some line drawings you find in other books. My favorite projects from the book are the Riveted Collar Ring on pages 62-63, the Fizzy Pendant on pages 66-67, Domed Petal Earrings on pages 78-79 and the Forged Chain Necklace on pages 80-81.
I enjoyed this book. It's lovely to look at and Jennifer's style is unique and intriguing. You'll be inspired by the book and want to learn all the techniques. Overall, Hot Connections is a wise purchase for any crafter, jewelrymaker or beadmaker.
I can't wait to get started!
disclosure of material connection
I'm always on the look out for books on techniques I want to add to my bead and jewelry making repetoire. My current artistic vision includes metal so I've acquired a few books on metal to help me develop new skills, Mixed Metal Mania, Metalworking 101 for Beads and my most recent book, Hot Connections Jewelry by Jennifer Chin.
Hot Connections Jewelry by Jennifer Chin - Excerpt
The cover is full of Jennifer's fresh and modern metal jewelry. The front cover alone made me want to dive right into the projects. Turning to the table of contents provides you with a snapshot of what's in store for you. Chapters include: Soldering Basics; Essentials of Fabrication & Soldering Techniques; Forming Metal: Other Fabrication Techniques; Textures, Patinas & Finishing; Adding Stones & Beads; Advanced Techniques.
If you're new to fabricating jewelry, Chapter 1, Soldering Basics takes you step by step in clear and simple directions on how to set up your studio and what soldering is all about. On page 21, she discusses the different kinds of torches and makes a recommendation based on how whether you're a hobbyist or production jewelry maker.
Chapter 2, Essentials of Fabrication is quite extensive covering, measuring, drilling, sawing, filing, sanding, bending, shaping, making jump rings, making rivets, soldering and pickling in 9 lessons. You don't want to skip any of the steps. I'm not a detailed oriented person and I tend to skip drawing out the measured lines but I've learned through many mistakes, it's not a step you want to skip.
Each chapter is set up to teach a category of techniques and then the chapter is broken down into techniques and projects. So for example, the category of techniques for chapter 3 is Forming Metal. One of the techniques in chapter 3 is taught in lesson 12: Using a Dapping Block. A list of tools and materials is given and step by step full color photos lead you through the skill of dapping. Lesson 12 is followed by the gorgeous Domed Petal Earrings project where you can put your new skill to use immediately.
If you've dabbled in jewelrymaking or have some of the tools like me, the first two chapters will help you fill in your tool chest with any missing tools. I just ordered a rolling mill for my studio and was excited to see on page 94 how to emboss using a rolling mill.
The book is interspersed with black and white sketches and full color photographs. The sketches are helpful and much more informative than some line drawings you find in other books. My favorite projects from the book are the Riveted Collar Ring on pages 62-63, the Fizzy Pendant on pages 66-67, Domed Petal Earrings on pages 78-79 and the Forged Chain Necklace on pages 80-81.
I enjoyed this book. It's lovely to look at and Jennifer's style is unique and intriguing. You'll be inspired by the book and want to learn all the techniques. Overall, Hot Connections is a wise purchase for any crafter, jewelrymaker or beadmaker.
I can't wait to get started!
disclosure of material connection
Labels:
book review,
Hot Connections,
Jennifer Chin
Friday, July 08, 2011
Funny Friday and Fabulous Links
see more Lolcats and funny pictures, and check out our Socially Awkward Penguin lolz!
About.com Jewelrymaking
Tammy has a new book review posted that will appeal to those who love little beads.
Art Bead Scene
Take the June monthly challenge blog tour.
Beading Arts
Cyndi has a fabulous copy of 30-Minute Rings to give away, Come and enter to win!
Beads and Books
Michelle is hosting a Mostly Metal Design Challenge with 3 different kits of materials: Filigree Fun, Gunmetal Love, and Antique Brass Romantic. Come join the fun!
Carmi's Art Life/World
Carmi creates a peace bird brooch with artbeads.com components.
Cindy Gimbrone Beads
Come take a peek at what Cindy's got on her bookshelf!
Earthenwood Studio
Melanie shares some new designs made with her new Fable Pebbles made by members of the Earthenwood Design Team
Resin Crafts!
Carmi shows you how to make a piece of crochet look like filigree!
Snap out of it, Jean! There's beading to be done!
Second chance to sign up for Beaducation DVD giveaway, time lengthened due to last week's holiday! Come on over and see what's up on jean's blog!
The Bead Dreamer
Join Charlene in a jewelry challenge to celebrate summer and long days. Click to find out how to participate.
The Writing and Art of Andrew Thornton
Andrew introduces some NEW vintage beads to his online Shop!
About.com Jewelrymaking
Tammy has a new book review posted that will appeal to those who love little beads.
Art Bead Scene
Take the June monthly challenge blog tour.
Beading Arts
Cyndi has a fabulous copy of 30-Minute Rings to give away, Come and enter to win!
Beads and Books
Michelle is hosting a Mostly Metal Design Challenge with 3 different kits of materials: Filigree Fun, Gunmetal Love, and Antique Brass Romantic. Come join the fun!
Carmi's Art Life/World
Carmi creates a peace bird brooch with artbeads.com components.
Cindy Gimbrone Beads
Come take a peek at what Cindy's got on her bookshelf!
Earthenwood Studio
Melanie shares some new designs made with her new Fable Pebbles made by members of the Earthenwood Design Team
Resin Crafts!
Carmi shows you how to make a piece of crochet look like filigree!
Snap out of it, Jean! There's beading to be done!
Second chance to sign up for Beaducation DVD giveaway, time lengthened due to last week's holiday! Come on over and see what's up on jean's blog!
The Bead Dreamer
Join Charlene in a jewelry challenge to celebrate summer and long days. Click to find out how to participate.
The Writing and Art of Andrew Thornton
Andrew introduces some NEW vintage beads to his online Shop!
Thursday, June 30, 2011
My Bookshelf: Mixed Metal Mania
I've got a few new books on my bookshelf that I want to share with you. I'll just share a favorite from the book and save you reading several paragraphs.
Mixed Metal Mania by Kim St. Jean is very comprehensive and full of techniques. What I love most is the discussion of "lashing" or the wire sewing cold connection technique I've used repeatedly with glass and found objects.
If you're interested in lashing and many other techniques, you definitely should pick this up!
Mixed Metal Mania by Kim St. Jean is very comprehensive and full of techniques. What I love most is the discussion of "lashing" or the wire sewing cold connection technique I've used repeatedly with glass and found objects.
If you're interested in lashing and many other techniques, you definitely should pick this up!
Tuesday, June 28, 2011
Tuesday Tangle: Hooking up Wire
Two weeks ago, I finally ordered the pixie bead tutorial from yoola on etsy. Since then, if you read my facebook page, I've been struggling to get the hang of it.
I thought this would be easy, afterall, I've crocheted since I was a kid but I never did thread crochet which probably would be of more help than the larger yarn I've used.
Right now, I'm at the knotty mess phase. You know, where you can't seem to even get past step one?
So I search YouTube for a few tips and hints. Here's a good one for those of us who are quite sure how that first loop gets started.
Wish me luck as I work my way to step two and three!
I thought this would be easy, afterall, I've crocheted since I was a kid but I never did thread crochet which probably would be of more help than the larger yarn I've used.
Right now, I'm at the knotty mess phase. You know, where you can't seem to even get past step one?
So I search YouTube for a few tips and hints. Here's a good one for those of us who are quite sure how that first loop gets started.
Wish me luck as I work my way to step two and three!
Monday, June 20, 2011
Coffee Talk: What's up with the MIA?
It's time to talk folks. I mean, what's up with the MIA, Cindy? You're pretty faithful to the blog and I can't imagine what would take you away.
You're right. What would take me away?
Another website.
That's right, another website. You all know that I have another life as a sign language interpreter. I've found it necessary to develop the business in that field and so it's taken away from the time I have to blog.
The website isn't quite ready to unveil yet. I'm putting all my free time into it.
While away from blogging, I had to upgrade my iPhone and have discovered a whole range of photography apps. So here's quick snapshot of some of the beads I haven't quite finished. Enjoy your day and I promise I'll be back as soon as I can!
Labels:
Coffee Talk,
iPhone photos,
poly clay,
sign interpreting,
word beads
Friday, June 03, 2011
Funny Friday and Fabulous Links!
Did YOU have your doughnut today? If not, go get one and sit down to read the fabulous Friday links!
About.com Jewelry Making
There are lots of recent graduates out there. Here are some jewelry tutorials designed for the graduate.
Art Bead Scene
The trend is bracelets. Check out the cool art bead components ABS found for you!
Barbe Saint John - New Jewelry from Forgotten Artifacts
t's jewelry "Re Do" time and a giveway of the finished piece
Beading Arts
Wire tutorials and resources galore on Beading Arts this week!
Beads & Books
Michelle shares the bracelet she made with a 4-hole porcelain bracelet bar from Chinook Jewelry.
Carmi's Art Life/World
Carmi features a newly molded pendant on this week's necklace sample.
Cindy Gimbrone aka Lampwork Diva
Look what's sprung up underneath one of Cindy's Red Lotus Pods!
Lorelei's Blog: Inside the Studio
Summer is just days away. Come on over to check out the latest installtion from the Earthenwood Design Team.
Resin Crafts!
Carmi has a four part series on mold making on Resin Crafts blog this week.
Snap out of it, Jean! There's beading to be done!
Jean reviews the third in a fine series of books by Marthe Le Van. This one is expressly about rings which you can make in 30 minute or less! And they are OUTRAGEOUSLY gorgeous. Come see!
The Bead Dreamer
Charlene creates a book and an alphabet stepping way outside the box. Don't we all need to from time to time?
The Writing and Art of Andrew Thornton
Andrew hosts another great Thursday Giveaway! This time ceramic beads from Golem Studio are up for grabs!
Wednesday, June 01, 2011
Bead Table Wednesday: Putting it all together
I'm pulling together a black glass mini-dip in a ring length size with a 32mm (1 and 1/4 inch) rich red disk bead and a 12mm Vintaj fairy petals beadcap to make this bold ring.
Friday, May 20, 2011
Nothing is Funny this week so Fabulous Links!
Ugh, I've spent the last 3 hours surfing YouTube, LOL Cats, the Daily Show and I can't find anything that I think is funny enough to share with you! So this week it's Fabulous Links!
A Bead A Day
It's Bead Mix week on A Bead A Day! Do you have a favorite bead mix you'd like to share? Stop on over!
About.com Jewelry Making
It's hot, and it's here - summer time! Enjoy our summer with these jewelry making and other crafting ideas.
Art Bead Scene
Copper is the new silver! Here are some copper-y ideas for you!
Beading Arts
And yet another chance to win a fabulous bead package giveaway!
Beads & Books
If you're in a creative rut, you might want to read what Michelle learned from interviewing bead artist Betsy Youngquist.
Carmi's Art Life/World
Carmi tests a package of Shrinky Dink for ink jet printers in order to make a new bracelet.
Cindy Gimbrone aka Lampwork Diva
Bright Colors are everywhere - here's a rewind on how to put some color into your designs!
Resin Crafts!
Carmi creates a ring combining Envirotex Lite resin and resin clay!
Snap out of it, Jean! There's beading to be done!
Jean received the most wonderful email from Pasty Evins! You must read it --it will make you, as an artist, think!
The Bead Dreamer
Charlene shares a bracelet made with moon beads, owl charms and thoughts on how we are more alike than different
The Writing and Art of Andrew Thornton
Andrew dishes on his secret ingredients for making affordable, but beautiful silver coin pendants!
A Bead A Day
It's Bead Mix week on A Bead A Day! Do you have a favorite bead mix you'd like to share? Stop on over!
About.com Jewelry Making
It's hot, and it's here - summer time! Enjoy our summer with these jewelry making and other crafting ideas.
Art Bead Scene
Copper is the new silver! Here are some copper-y ideas for you!
Beading Arts
And yet another chance to win a fabulous bead package giveaway!
Beads & Books
If you're in a creative rut, you might want to read what Michelle learned from interviewing bead artist Betsy Youngquist.
Carmi's Art Life/World
Carmi tests a package of Shrinky Dink for ink jet printers in order to make a new bracelet.
Cindy Gimbrone aka Lampwork Diva
Bright Colors are everywhere - here's a rewind on how to put some color into your designs!
Resin Crafts!
Carmi creates a ring combining Envirotex Lite resin and resin clay!
Snap out of it, Jean! There's beading to be done!
Jean received the most wonderful email from Pasty Evins! You must read it --it will make you, as an artist, think!
The Bead Dreamer
Charlene shares a bracelet made with moon beads, owl charms and thoughts on how we are more alike than different
The Writing and Art of Andrew Thornton
Andrew dishes on his secret ingredients for making affordable, but beautiful silver coin pendants!
Wednesday, May 18, 2011
Bead Table Wednesday: Fairy House
I don't know what possessed me last week, but a fairy house sprung up under one of my red lotus pods on my beadmaking table.
Labels:
Bead Table Wednesday,
fairy house,
new beads,
poly clay
Tuesday, May 17, 2011
Tag-a-long-Tangle: On the front cover!
I'm thrilled that my Easy Loop earrings project is on the front cover of 10 5 Minute Wire Jewelry Projects from Interweave. Great news for you too, Interweave is having a sale on their books this week. So be sure to check it out!
Labels:
earrings,
published project,
Step by Step Wire,
Wire Jewelry
Tuesday Tangle Tutorial: Well Loved Earrings
This week the Tuesday Tangle is a tutorial.
A Tangle Tutorial - get it?
Ok ok, before I chase you away with my bad jokes, today's tangle is a reward for you coming back. Last Saturday, I debuted my new word beads on Studio Saturday. So today, I'd like to show you a quick pair of earrings I've made with the new beads. I call these, "Well loved" because your best friends and allies love you best.
Supplies:
Ally word beads
Two (2) Vintaj pearl headpins
Two (2) Vintaj kidney earring wires
Two (2) Vintaj 8mm foliage bead caps
Four (4) vintage 3.5mm orange firepolished Czech glass beads
Tools:
Dapping Block/punch set
hammer
roundnose pliers
wire flush cutters
file
1. Open the Vintaj 8mm foliage bead caps to fit the 12-13mm Ally word beads. Place in the dapping block and hammer with the punch to widen the 8mm bead cap. Start with a size just slightly larger than the 8mm bead cap. Go up to the next size and tap with the punch to widen the bead cap more. Keep gradually widening the cap until it is able to fit over the 12mm Ally word bead. Do this with all four beadcaps.
2. String in this order onto the Vintaj pearl headpin: vintage orange Czech bead, foliage bead cap, Ally word bead, foliage bead cap, vintage orange Czech bead.
3. Cut the headpin down to approximately 1/2 inch from the top of the orange Czech bead. If the end of the wire is sharp, file to make it smooth.
4. Use your round nose pliers to make a loop. Do steps 2-4 to make the matched pair.
5. String onto the kidney wires.
There you have it! Your own set of "Well Loved!"
Labels:
earrings,
how-to,
Tuesday Tangle,
tutorial,
word beads
Subscribe to:
Posts (Atom)