Showing posts with label Tuesday Tangle. Show all posts
Tuesday, October 25, 2011
Tuesday Tangle: Duos Earrings
Finally! A piece of finished jewelry from the metal clay class! These are meant to be very worn and rough. They were extra test blanks I had rolled out to test the kiln. But their simplicity is striking - copper base with bronze centers. The violet patina on the copper earwires is made in a flame.
What do you think?
Tuesday, October 04, 2011
Tuesday Tangle: I'm a little scared....
I have to admit it, I'm a little scared.
I've signed up for a Hadar Jacobson class for this upcoming weekend. Originally, it was supposed to be a beginner to advanced class, the first two days, a beginner class and then the last two days would build on the first two. So I signed up, but sometime in between, the class became advanced. No beginner.
I've worked with metal clay but I wouldn't exactly say I was an advanced metal clay artist. So I'm worried everyone else will be a master and I'll be the dumb one in the class.
But I'm going anyways.
I've wanted to take a class with Hadar for a long time and I don't want to miss out on it. Wish me luck and let's hope I'm not the class dum-dum!
Tuesday, September 27, 2011
Tuesday Tangle: Inspired by Flickr

If you're a Flickr member, you know there is lots of inspiration to be had there. One of my favorite groups is Wire Sculpture.
Here are some of the inspirational goodies that can be found in the group:
Woman Sculpture by Duffy Designs
Have you joined Flickr and found inspiration?
Tuesday, August 30, 2011
Tuesday Tangle: One Step Ahead with a Poinsetta Ring
I know summer isn't over yet, but as a glass artist, I always need to be one step ahead in my designs. So, I've used a wire wrapping technique and the double dips to make a poinsetta ring for the holidays.
The poinsetta ring is offered as finished jewelry. It's not offered as a tutorial. I hate to say this but because I've seen a few people copy my work and sell it as their own, please don't copy the design. Just because it's posted on my blog doesn't mean it's open to copy. Thank you for respecting that. Now back to work!
I've got several other holiday projects on the workbench. Gotta stay one step ahead!
Tuesday, August 23, 2011
Tuesday Tangle: Cat's Heart Has Got Me in a Tangle
My Bead Soup from Cat has arrived, folks! I gotta say I ran around in circles for a little bit when I opened the package and saw all the girly-goodness inside! A large copper etched heart pendant and a heart toggle paired with the super girly colors of pink, ruby and amethyst!
The explosion of girly-goodness made me think of the Power Puff girls and how they were created in an explosion with Chemical X! Girl Power!
Now it's time to get to work creating my own girly jewelry explosion! Thanks Cat!
Squeeeeee!!
Here's a little closer look at that lovely heart!
Tuesday, August 16, 2011
Tuesday Tangle: Steel Wire Book
Ok, this week's Tangle falls under the "DUH!" Category. Yep, that's gotta be one of my tags from now on, search engine optimization (SEO) be D@&%%#!!!
When the shoe fits, ya gotta wear it.
I just got Brenda Schweder's latest book (at least I think it's her latest book, I mighta missed the train more than once), Steel Wire Jewelry.
DUH! Why did not the self confessed Wirehead have this the moment it was out?
I hang my head in shame.
It was the after holiday checkbook that made me do it.
But, I'm correcting it today.
Steel wire is the new copper. In the days before gold hit $1500, one would go to the hardware store and buy copper wire to practice. Today, thieves go into abandoned houses to strip it of all of its copper plumbing and wiring to sell. So if you're still practicing on copper wire, make sure you never leave your home too long!
Steel wire is inexpensive and some have replaced copper with steel as the new practice wire.
While at the hardware store buying your steel wire, pick up some general wire cutters and an extra set of needle nose and chainnose pliers. Steel is different than copper and you don't want to ruin your jewelry making tools to practice.
Many of the projects in Brenda's book use 16 gauge or heavier steel wire. I love the look of the heavy gauge and Brenda's projects are well suited to wire's assets. I love all of the projects but especially the Lotus Ring and her techniques for setting stones in pendants. The Lotus Ring is a way to set a stone and it's a technique I'm not very versed in. I can router glass to set it with wire, but not so good with the found objects and stones. Brenda is a master.
Now - off to the hardware store for that 16 gauge steel wire!
Labels:
book review,
Brenda Schweder,
duh,
steel wire,
Tuesday Tangle
Tuesday, August 09, 2011
Tuesday Tangle: Iron wire
I love to see what kinds of things can be made with different types of wire. Not only the wearable but housewares like this sinuous lamp I spotted on Etsy.
Here's a lovely necklace my friend, Barbe Saint John made with iron wire using one of my lampwork focals (it's the one on the left).
I know you're going to ask me, where do I buy iron wire? My favorite place Metalliferous has it as well as Dick Blick.
Give iron wire a try, it's inexpensive and has a trendy look!
Tuesday, August 02, 2011
Tuesday Tangle: Rolled Metal!
I unveiled my new rolling mill last week so today I'm unveiling what I've done with it! Below are the first few disks of copper and brass I made. You can see one is a little bit more oval than round - it was really hard to roll that one through the mill!
Here's a little closer up....
I used 22 and 24 gauge copper and brass disks. I polished them up and used my Euro-Power-Punch to make holes after I'd rolled the disks. Making these is seriously addictive!
Tweet
Here's a little closer up....
Tweet
Labels:
brass,
copper disk,
disk,
rolling mill,
texture,
Tuesday Tangle
Tuesday, July 26, 2011
Tuesday Tangle-Tech: Interweave's Live Wire eMag
Ok, I'm a tech-gadget geek. Statistics say I'm not supposed to be a gadget geek, but since when have I been a statistic?
So when I saw that Interweave was publishing Live Wire, I had to download it as soon as it was available.
I've got everything Mac, so I chose to download the Mac version. First of all, let me say kudos to Interweave for being quick to offer digital versions of their magazines so quickly. Not just beading magazines but their knit and crochet magazines along with many others. Kudos for not buying into the statistics that say my demographic isn't tech savvy, I think there are alot of us out there.
Now, onto Live Wire. I downloaded the eMag without any trouble from the website. It ran on my 2007 iMac without any trouble. Live Wire is beautifully laid out and has many within eMag videos to show you how to do the basics of wire wrapping. If you're not always good with following written directions like me, the videos are fabulous. You can see how to hold the pliers and which direction to wrap your wire. I like digital versions like Live Wire because with a click you can jump around to the areas that pique your interest rather than flipping pages to find what you want.
Live Wire is for beginning wire artists. It takes you through step by step with choosing wire, straightening wire, making eye pins, labeling and explaining pliers and more. There's also a nice section on patinas. If you're a beginner and a tech geek, you're gonna love this! If you're an intermediate to advanced wire artist and gadget geek, I'd go with the digital versions of Step by Step Wire or if you love mixed media with your wire Cloth Paper Scissors. Since Interweave is digital, there's lots for beginners, intermediate and advanced wire artists to enjoy! Keep it up, Interweave, I love your tech-savvy-ness!
Labels:
digital magazines,
eMag,
tech,
Tuesday Tangle
Tuesday, July 19, 2011
Tuesday Tangle: What's your Wire Style?
What's your wire style? I like modern, simple, clean lines. My personal style is different from what we do over at ABS so today is a great opportunity to sing what I love!
Lisa's Lovelies has designed several pieces showcasing clever and modern use of wire wrapping and cold connections. I like how she embellishes judiciously using a single bead or pearl with the herringbone wrap.
Apple Coral O Necklace
What's your wire style?
Tuesday, June 28, 2011
Tuesday Tangle: Hooking up Wire
Two weeks ago, I finally ordered the pixie bead tutorial from yoola on etsy. Since then, if you read my facebook page, I've been struggling to get the hang of it.
I thought this would be easy, afterall, I've crocheted since I was a kid but I never did thread crochet which probably would be of more help than the larger yarn I've used.
Right now, I'm at the knotty mess phase. You know, where you can't seem to even get past step one?
So I search YouTube for a few tips and hints. Here's a good one for those of us who are quite sure how that first loop gets started.
Wish me luck as I work my way to step two and three!
Tuesday, May 17, 2011
Tuesday Tangle Tutorial: Well Loved Earrings
This week the Tuesday Tangle is a tutorial.
A Tangle Tutorial - get it?
Ok ok, before I chase you away with my bad jokes, today's tangle is a reward for you coming back. Last Saturday, I debuted 
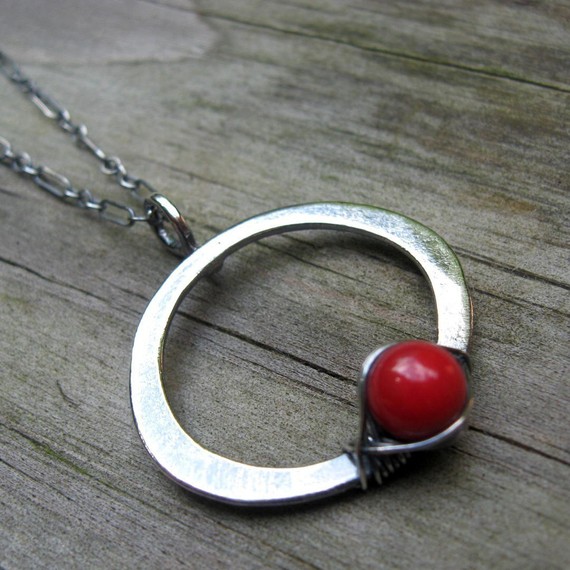
my new word beads on Studio Saturday. So today, I'd like to show you a quick pair of earrings I've made with the new beads. I call these, "Well loved" because your best friends and allies love you best.
Supplies:
Ally word beads
Two (2) Vintaj pearl headpins
Two (2) Vintaj kidney earring wires
Two (2) Vintaj 8mm foliage bead caps
Four (4) vintage 3.5mm orange firepolished Czech glass beads
Tools:
Dapping Block/punch set
hammer
roundnose pliers
wire flush cutters
file
1. Open the Vintaj 8mm foliage bead caps to fit the 12-13mm Ally word beads. Place in the dapping block and hammer with the punch to widen the 8mm bead cap. Start with a size just slightly larger than the 8mm bead cap. Go up to the next size and tap with the punch to widen the bead cap more. Keep gradually widening the cap until it is able to fit over the 12mm Ally word bead. Do this with all four beadcaps.
2. String in this order onto the Vintaj pearl headpin: vintage orange Czech bead, foliage bead cap, Ally word bead, foliage bead cap, vintage orange Czech bead.
3. Cut the headpin down to approximately 1/2 inch from the top of the orange Czech bead. If the end of the wire is sharp, file to make it smooth.
4. Use your round nose pliers to make a loop. Do steps 2-4 to make the matched pair.
5. String onto the kidney wires.
There you have it! Your own set of "Well Loved!"
Labels:
earrings,
how-to,
Tuesday Tangle,
tutorial,
word beads
Tuesday, May 03, 2011
Tuesday Tangle....Primary Dip Ring
Had some fun at the torch and flattened out some of the shorter double dips. They make a perfect ring!
Tuesday, April 19, 2011
Tuesday Tangle - Tangled up in a Re-do
I may be absent from blogging but I haven't been absent from spring cleaning and re-doing my home office/jewelry studio. It's a slow process, trying to squeeze out some extra time from my already over-scheduled day. You might remember the cleaned out home office I showed you a couple weeks ago. Added to the picture below is a white pegboard my husband put up for me.
Last weekend, I had a whole day to myself so I spent the time running between home and the hardware store to buy just the right pegboard components to mount my jewelry tools and chain
You may notice the grouping of butterflies I added over the pegboard. I love the wall decals you can buy on Etsy to add interest to a wall of your favorite color. You can't really see the butterflies that are on the sheer curtains in the picture above this one but the wall decals carry on that theme.
I collected all my pliers and cutters to put on the pegboard. It's funny how you don't realize how many tools you have until they are all in one place!
Thinking of adding a pegboard to your workspace? I found a nice how-to on eHow that will help you. If you'd rather buy them yourself? Here's some colorful options made of metal from Wall Controland here's a list of places from eHow.
Tuesday, April 12, 2011
Tuesday Tangle: Pink, Brass and Coiling
I've been away working working working! My creative life has been on hold while I earn some summer money. However, I managed to squeeze out some time to post today. I went out to the studio and played around with the torch a couple of weeks ago. I made these lovely soft pink drops that I used in today's Tangle.
I used a coiling technique with 24 gauge Vintaj colored wire. The lovely brown color of the Vintaj brass complements the soft translucent blush pink glass. So, I'm calling this "First Blush."
A basic technique like coiling adds to the texture and interest of the piece. You don't have to always make complicated wire stitches to create an interesting design in your work.
Have you created interesting pieces in wire using basic techniques?
Labels:
drops,
necklace,
pink,
Tuesday Tangle,
Wednesday Wire
Tuesday, March 15, 2011
Tuesday Tangle: Take Up A Challenge!
With spring in the air, I don't need alot to get my energy up. But what to do with that energy?
I'm going to pour it into the Cloth Paper Scissors Wild Wire Reader Challenge!
Wild Wire is right up my alley!
Tuesday, February 22, 2011
Tuesday Tangle: Wire Technique
G'morning, Readers! This week's Tuesday Tangle finds me working on basic wire weaving technique. If you're not already an accomplished wire weaver and want to join me, click on over to "Basic Weaving Techniques" on jewelrylessons.com and don't forget to download "Basic Weaving Techniques 2, Adding New Wire" The tutorials are by Donna Spadafore of Gailavera Jewelry.
Photo Courtesy of Gailavera on jewelrylessons.com
Get out your practice wire and share with me what you're working on in wire this week!
Tuesday, February 08, 2011
Tuesday Tangle: Digital Art Project
In last week's Tangle I shared my "DO" for the week. I was working on learning a new skill - creating digital art using the book Digital Expressions.
The book uses Photoshop Elements but will work if you have Photoshop (which is what I have). The concepts are the same but the menus are different in many places, so it takes some searching to figure out exactly which command will fit for the desired effect.
I worked through the first three projects in the book. Below is the third project called "Designing with Type." I can create a unique banner using the techniques for this project.
I took two images and overlayed them. I picked two that were on my computer. I wanted to have two very different images so I chose the flowers and a fuzzy image of myself.
I've had a phrase in my head that I've been working on incorporating into jewelry, "what matters most." I typed it out in different fonts and placed it willy nilly across the image. I added a few more effects and this is what I got:
Next up will be bead images for a new banner and custom shipping/wrapping materials.
What did you "DO" this week?
Labels:
DO,
Tuesday Tangle,
Wednesday Wire,
word for the year
Tuesday, February 01, 2011
Tuesday Tangle...Keeping myself on track
Remember my word for the year is, "do" which lends itself to showing what I've made during the past week but this week, what I've done is less concrete.
I'm reading a book.
Digital Expressions by Susan Tuttle. I need a new banner, I need a new look on my website and in my business cards. So, I've turned to this book to help me out. Working 40-50 hours a week doesn't leave me much time to get to the computer to work on new skills, but I'm taking it one step at a time.
Cliche I know but sometimes a cliche works.
When all I want to do starts to overwhelm me and I start to wander off to window shop on the web, I repeat my simple objective....
DO.
Right after I think or say do, I follow it up with don't look, don't think, do.
do
do
do.
It's keeping me on track.
Are you doing? What's keeping you on track?
Tuesday, January 25, 2011
The Wednesday Wire Becomes the Tuesday Tangle....
Wednesdays are overbooked lately. I can't resist Heather's new Bead Table Wednesday so where is that leaving my weekly Wire Jewelry post, the Wednesday Wire? It's such a catchy name, how can I give it up? Well, I'm not, it's going to become the Tuesday Tangle.
Get it? As in tangled wire?
I've even made a little logo for it so you can remember to come back on Tuesdays.
So, for this week's Tuesday Tangle, I'm showing off some retro style wire earrings.
These are made with homemade fused transparent glass nuggets and non-tarnish silver wire. I wrapped the wire around the groove I made in them and then twisted the wire at the top. I love this silver wire, it has the look and feel of sterling. The earrings have a nice swing to them, very groovy, baby.
Subscribe to:
Posts (Atom)


